I bought this 4 way buffer at Wal-Mart for roughly $3.46. The four steps are:
- Even Out
- Smooth
- Buff
- Shine

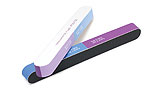
Revlon Shape N Buff Nail Buffer
The thickness of this buffer was also a problem for me. I’ve use thinner buffers with great results. I’m able to get the thinner buffers all around the curve of my nail without much effort since they will bend a little bit. The Revlon Shape-N-Buff is too thick to bend.
I did try to use the coarse and fine grit emery boards (the black and white sides) on the Shape-N-Buff but because of the thickness of this buffer I really couldn’t use them effectively. In all fairness, I do keep my fingernails fairly short so someone with longer fingernails or acrylics should be able to use the emery board part without much problem.
The emery boards did interfere with buffing my nails. I found myself scratching up my nails while I was trying to smooth and shine them if I wasn’t really careful. So, Revlon Smooth-N-Shine? No, thanks. I’ll stick to my cheap emery boards and 3 way buffer.
I purchased this nail buffer with ny own funds.